![Top 4 Ways to Recover Deleted Images on Mac Devices [With Step-by-step Guide]](https://cybersguards.com/wp-content/uploads/2022/10/Top-4-Ways-to-Recover-Deleted-Images-on-Mac-Devices-With-Step-by-step-Guide.png)
We’ve all accidentally deleted important photos—whether it’s irreplaceable family moments, work project files, or critical marketing images. If you’re a Mac user, you’ve probably asked yourself: “Is there a way to recover deleted images on Mac?” The good news? Yes, there are multiple ways, ranging from simple built-in recovery options to advanced data recovery tools.
Whether you’re a CEO, an IT manager, or just a creative professional, losing images can lead to frustration and even financial loss. In some cases, hackers, malware, or ransomware can also cause deletion, adding a cybersecurity risk.
This comprehensive guide will take you step by step through the core recovery methods to help recover deleted images on Mac—plus useful strategies to avoid losing them again in the future.
Why Do Images Get Deleted on Mac?
Before jumping into solutions, it’s important to understand why files go missing. Common causes include:
-
Accidental Deletion: The most frequent cause is unintentionally removing files from Trash.
-
Emptying the Trash Too Soon: Many users clear Trash immediately without double-checking.
-
Formatting Drives: Cleaning storage devices without backing up first.
-
Malware or Ransomware Attacks: Malicious programs sometimes delete or encrypt photos.
-
External Device Issues: SD cards, USB drives, or external HDDs can become corrupted.
-
Human Error in Cleanup: Renaming, moving, or batch-deleting files incorrectly.
Understanding how photos get lost helps in choosing the right recovery path.
First Things to Try Before Advanced Recovery
Not every deleted photo requires advanced software. Start simple first.
1. Check the Trash Bin
-
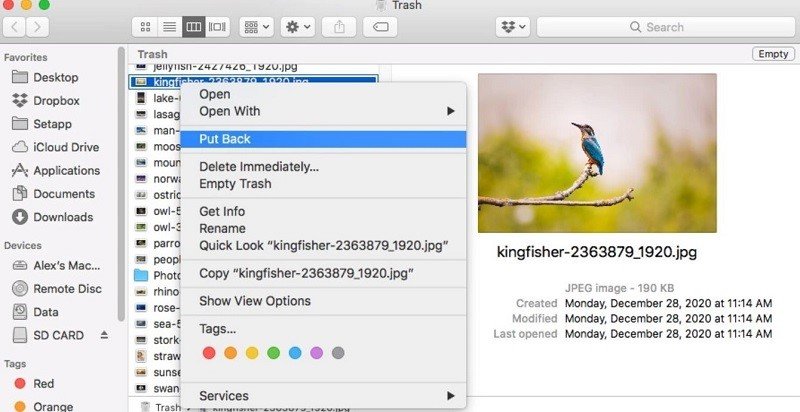
Deleted files often land in the Trash folder.
-
Open Trash from the Dock, locate your photo, right-click, and select Put Back.
-
If recently deleted, this is the easiest way to restore.
2. Check the Recently Deleted Folder (Photos App)
-
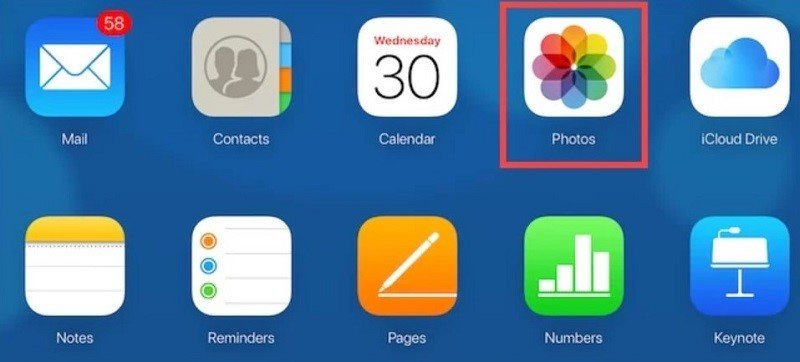
If the photo was in the Photos app, it may still be in the “Recently Deleted” album.
-
Open Photos → Albums → Recently Deleted.
-
You’ll see permanently deleted dates for each file (default storage is 30 days).
-
Select the photos and hit Recover.
If neither of these works, move to backup-based recovery.
Recover Deleted Images on Mac Without Software
Fortunately, Apple provides several built-in recovery tools.
Method 1: Time Machine Backup
Apple’s built-in Time Machine feature can restore older versions of photos or entire folders.
Steps:
-
Connect your Time Machine backup drive.
-
Open the folder where the image was located.
-
Launch Time Machine from the menu.
-
Scroll through backups → Select the image file.
-
Click Restore.
Great for business leaders who need to restore images from previous projects or campaigns.
Method 2: iCloud Photo and File Sync
If you use iCloud:
-
Go to iCloud.com → Photos → Recently Deleted.
-
Select the file and click Recover.
-
For files in iCloud Drive, go to iCloud Settings → Advanced → Restore Files.
Method 3: External Backup Drives
If you routinely back up to an external disk, check saved folders for older versions.
Recover Deleted Images on Mac with Third-Party Software
If file deletion goes beyond Trash and backups, recovery software is often the only solution.
How Recovery Software Works
When files are “deleted,” they aren’t immediately erased from the disk. Instead, the system marks the space as reusable. Until it’s overwritten, recovery tools can scan and restore those files.
Popular Mac Recovery Software Options
-
Disk Drill – Known for user-friendly interfaces and preview features.
-
Stellar Data Recovery for Mac – Business-grade recovery options.
-
EaseUS Data Recovery Wizard – Efficient at recovering lost photo formats (RAW, JPEG, PNG).
Process Overview
-
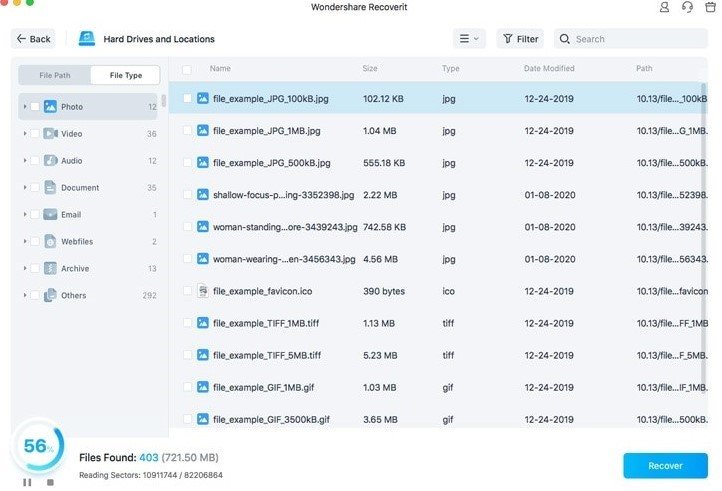
Download and install a recovery tool.
-
Select the drive where images were stored.
-
Run a deep scan.
-
Preview recoverable images.
-
Restore selected photos to a safe new location (not the original drive).
This is especially useful after formatting drives, corruption, or malware deletion.
Advanced Recovery Situations
Certain cases may require special attention or professional help:
-
Formatted Hard Drives: Recovery tools can often pull files even after a format.
-
External Devices (USB/SD cards): Mac recovery tools usually support external storage.
-
File System Errors: Mac HFS+/APFS corruption may require more robust forensic tools.
-
Professional Data Recovery Services: For critical business photos with extremely high value.
Cybersecurity Angle – When Malware Deletes Your Images
In some cases, it’s not just user error—malware is responsible.
-
Ransomware: Encrypts files and demands payment.
-
Wiper Malware: Designed to destroy files without ransom.
-
Spyware/Trojans: Sometimes delete files to cover tracks.
How to Minimize Malware-Related Losses
-
Use antivirus/endpoint protection.
-
Regularly scan Mac storage for suspicious activity.
-
Store encrypted backups offline (cold storage).
-
For CEOs: implement company-wide incident response playbooks.
Best Practices to Avoid Losing Images in the Future
Recovery is helpful—but prevention is smarter.
-
Enable Time Machine Backups: Set automatic hourly backups.
-
Use iCloud or Other Cloud Storage: Sync photos across devices.
-
Keep Multiple Backups: Use both local and cloud-based backups.
-
Train Staff (for businesses): Ensure employees handle file management with care.
-
Use File Versioning: Helps retrieve older edits.
-
Avoid Risky Downloads/Attachments: Protect against malware infections.
FAQs on Recovering Deleted Images on Mac
Q1: Can I recover images after emptying the Trash on Mac?
Yes, using Time Machine, iCloud recovery, or data recovery software before the data is overwritten.
Q2: Are free recovery tools safe?
Some are, but always verify the credibility of the provider. Premium tools are more reliable.
Q3: Can I recover corrupted images?
Partially. Recovery software can restore corrupt files, but they may be unusable depending on the damage.
Q4: How long are “Recently Deleted” photos kept on Mac Photos?
30 days. After that, they are permanently removed.
Q5: Can malware cause permanent deletion of photos?
In some cases, yes. That’s why endpoint security and backups are critical.
Conclusion
Accidentally deleting photos can feel like a disaster, but in most cases, you don’t have to panic. From checking Trash and Recently Deleted albums to using Time Machine, iCloud, or recovery software, there are many ways to recover deleted images on Mac.
But prevention is key: consistent backups, employee training, and strong cybersecurity measures ensure you won’t lose critical media in the future. For businesses, especially CEOs and founders, securing digital assets is just as vital as protecting financial ones.
Want to share your tips on data recovery or cybersecurity best practices? Contribute your insights at CyberSGuards’ Write for Us.