General Description
With the advent of the new network era, our life is suffused with videos. Even our common people have requests for video editing, not to mention those new media workers, YouTubers, or Vloggers. If you want to post your video, you will for sure deal with video trimming. However, finding a truly effective and free video clip is not a piece of cake. In this article, I’d like to recommend to you the three best solutions for how to trim a video for FREE. It will cost you about 15 minutes to read. It will be appreciated if you figure it out after your reading. Here is a list of the three video trimmers that I suggest.
- WorkinTool Watermark Eraser
- Adobe Creative Cloud Express
- YouTube Studio
1. WorkinTool Watermark Eraser
WorkinTool Watermark Eraser is new in the market. It is an all-in-one video and image editor, which can realize trimming and resizing videos, editing images, removing, and adding watermarks to videos and photos. Its interface is so concise and comfortable that even new video editors can use it without any effort. Also, only a few steps will offer you a perfectly trimmed video of high quality. More importantly, it has a long period of the free trial. All its functions are FREE without any request.
Reasons to Have It
| Free
| Completely free; no task quota for a free trial |
| Easy-to-operate | Only need to follow a few steps; the operation is effortless |
| Safe
| Asks for no registration or login. You don’t need to input your email or phone number either. |
| Powerful | Functions like resizing, adding, and removing watermarks are available. |
| Trustworthy
| Developed by an experienced and reliable software company |
How to Trim a Video with WorkinTool Watermark Eraser?
Now please follow the steps below to get the video trimmed by WorkinTool.
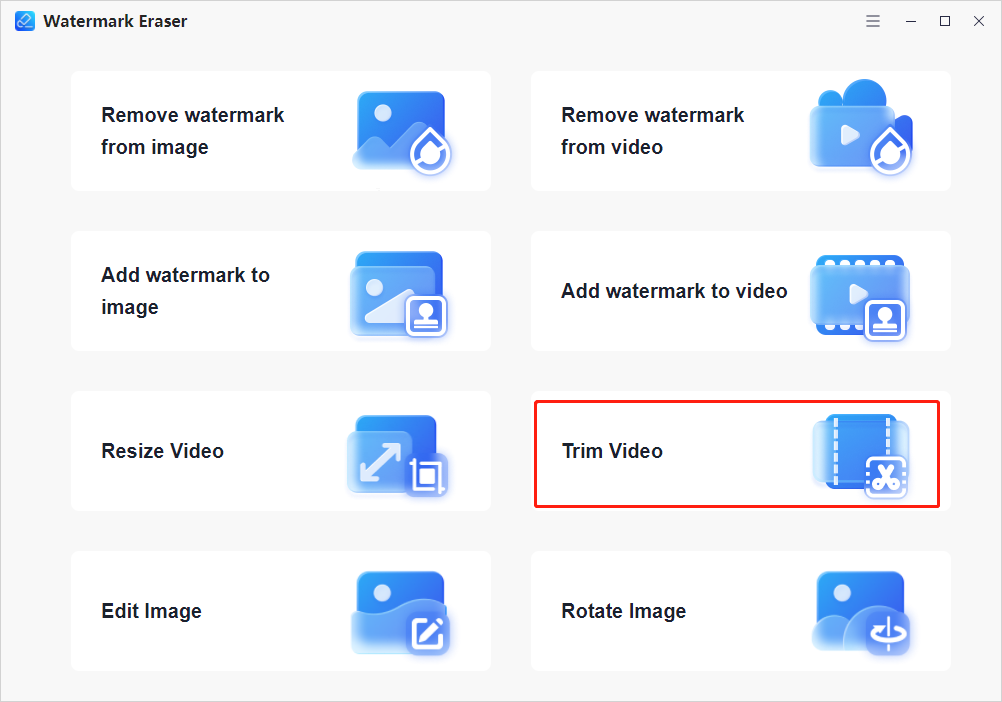
Step 1. Open the tool. Find Trim Video then click it.
Step 2. Upload your video by selecting it from your folder or dragging it to the blank box directly.

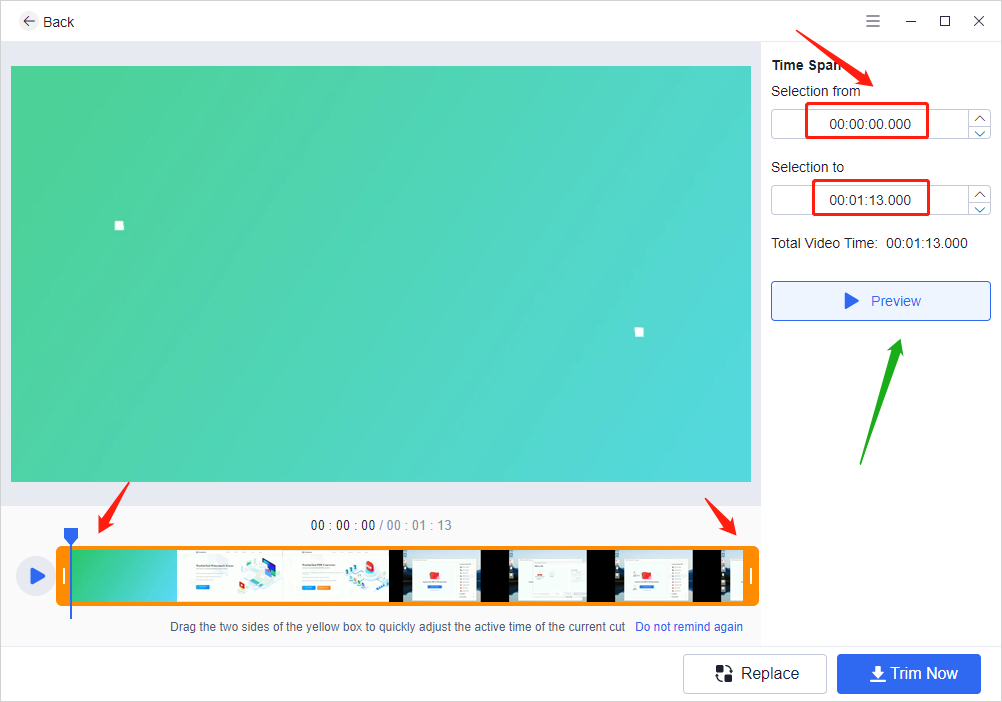
Step 3. You can trim it by dragging the two sides of the yellow box or setting the TimeSpan at the top right corner. After trimming, you can press Preview to check the result.
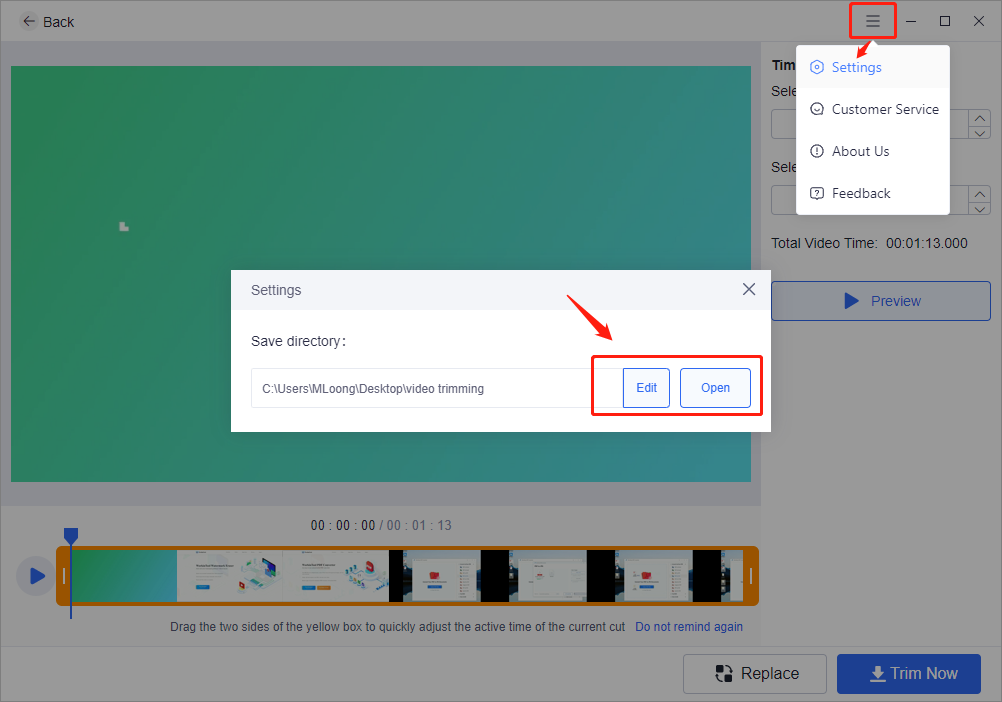
Step 4. Adjust the saving location if you want. Click the icon then choose settings to change the location. After that, click Trim Now, then a new cut video will be saved in your folder directly.
This software provides a high degree of freedom to operate. It is viable for you to constantly check the result of the trimmed video before you download it.
2. Adobe Creative Cloud Express
Adobe is a well-known multinational company that is dedicated to innovative computer software. Creative Cloud Express is one of their products. It fulfills video editing, including cropping, trimming, merging resizing videos. If a reliable brand is what you want, you can have this one a try. However, to use it you must sign in or create your account at first, which is a little hassle for new users. In addition, the uploading speed is slower than the first desktop tool that I have recommended. As to its price, currently, it is free only for basic operations. If you want to have access to their advanced functions, you must be their pro user.
Pros & Cons
| Pros & Cons of Creative Cloud Express | |
| Pros | Cons |
| Developed by a large company High-quality output Powerful Free for basic usage | Slow converting speed Registration is necessary to download New users need to create an account |
How to Use it?
Here is a detailed tutorial on how to trim a video with Creative Cloud Express.
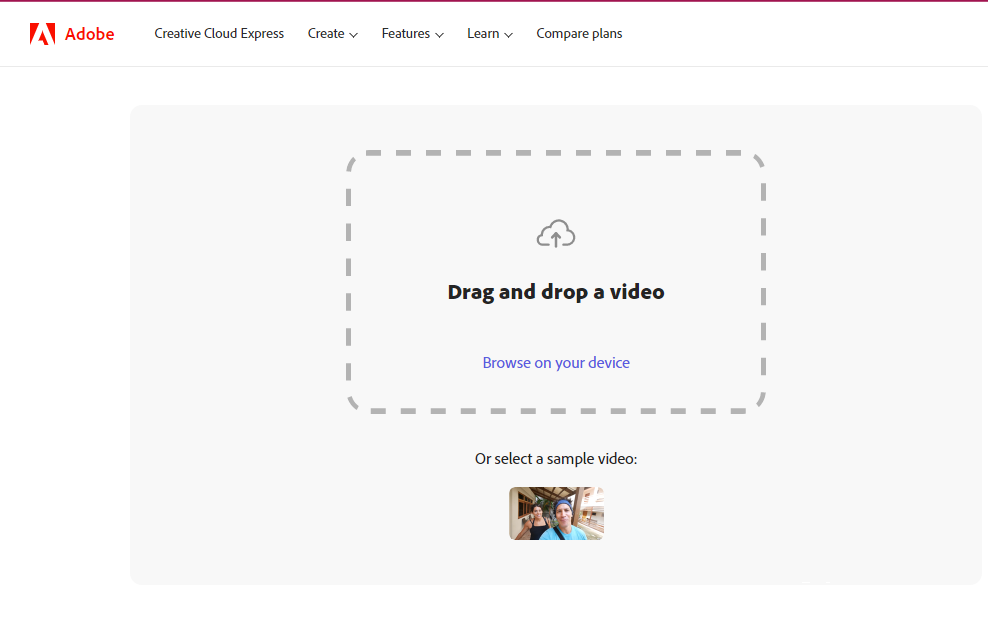
Step 1. Open Creative Cloud Express video trimmer. Upload your video to the box.
Step 2. Trim your clip by sliding the handlebars or enter in time cuts manually. You can adjust the landscape of the video by clicking Size.
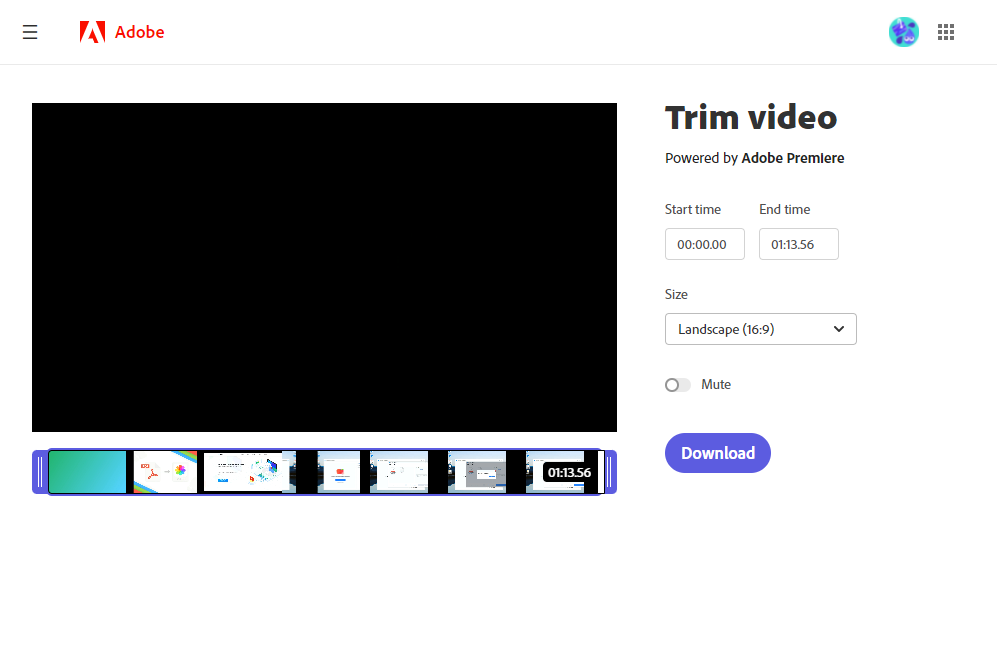
Step 3. Download your newly trimmed video clip. If you are a beginner, you need to register your account in this step.
Also Read: Best Free Online MP4 and Video Converters
3. YouTube Studio
If you are a YouTuber, you will not be foreign to this tool. YouTube Studio is a platform where you can make and share your videos. It is a powerful video editor as well. It offers users a free way to trim a video, add subtitles and background music, etc. However, the platform will examine and verify your video at the beginning, you have to wait for a while before you trim your videos.
Notice: You can only cut a video by YouTube Studio after you upload it.
Pros & Cons of YouTube Studio as a video trimmer
| Pros | Cons |
| Authoritative No installation Powerful Free
| You need to upload first You have to wait for the examination You must have a personal account |
Instruction
Here is a brief guide about how to trim a video with YouTube Studio.
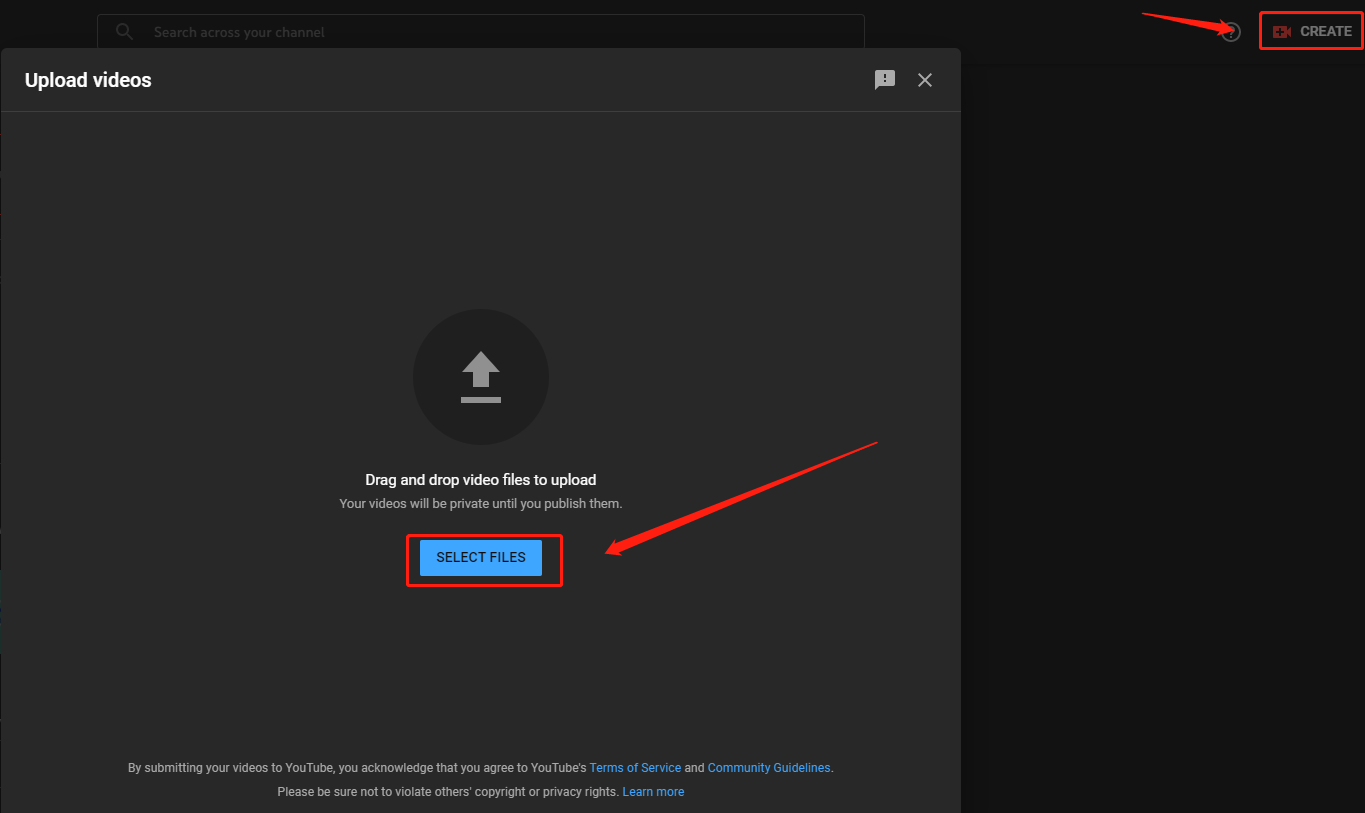
Step1. Upload your video to your YouTube channel by clicking CREATE.
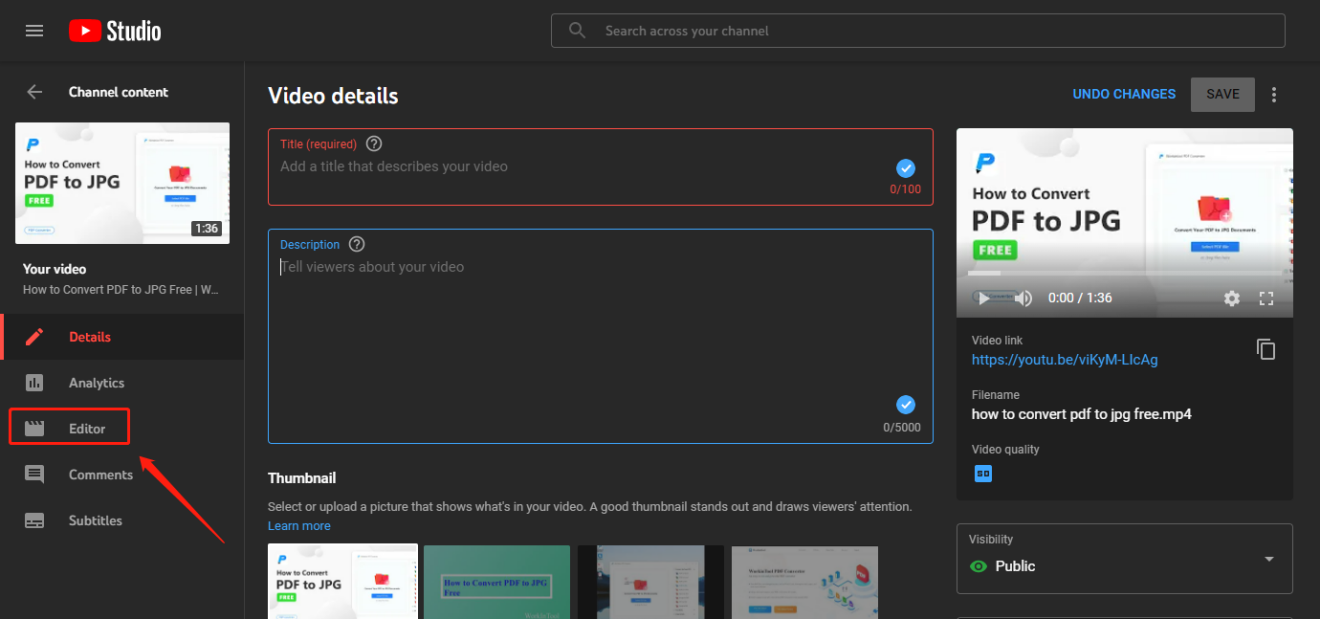
Step2. Choose Editor in the left tool column.
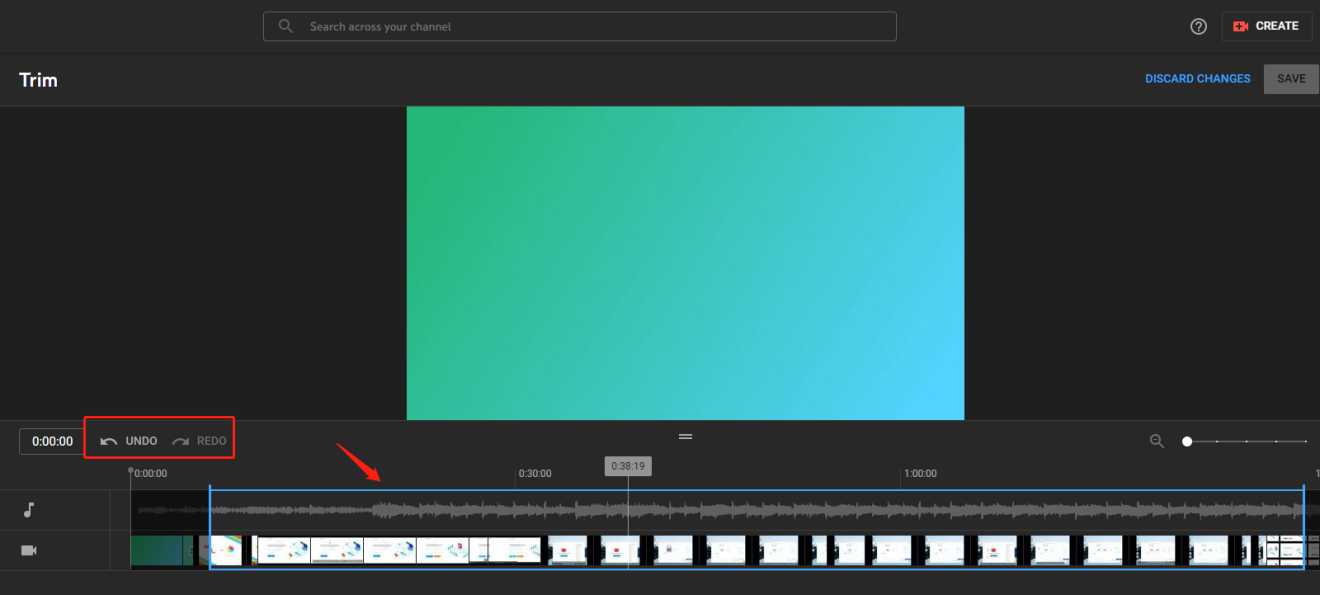
Step3. Click Trim to shorten a video. You can trim a video by adjusting the blue bar. It is available to re-operate by clicking UNDO and REDO. After your setting, don’t forget to press SAVE. You can download your trimmed video as you like.
Also Read: How to Download Any Video From the Internet?
Conclusion
All the three tools that I have suggested to you are costless to use. Hope this article can make you find a truly helpful and effective video cutter. Personally speaking, I’d like to make WorkinTool Watermark Eraser the first choice. Not only because it is beginner-friendly, but also it is a powerful video editing tool. Its function of adding watermarks is what a video maker needed as well. I prefer to choose an all-in-one desktop software rather than a simple-function tool. Thanks for your patient reading again. Hope you have found out how to trim a video for free.


FIND US ON SOCIALS